Twinkle Twinkle LED
This project builds a simple series circuit.
2 minutes
Project Link: Twinkle Twinkle LED
Project Gallery:


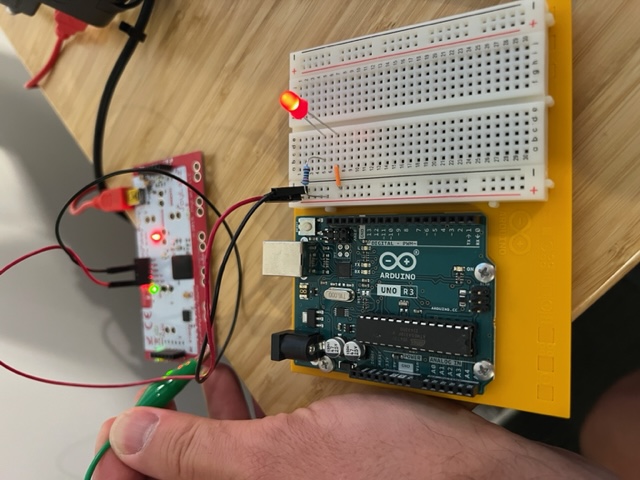
The scratch is very simple without the Makey-Makey kit attached. Whenever you press the space bar the wizard makes a star briefly appear with a flourish. But with the Makey-Makey kit connected and the circuit constructed correctly, it also lights up the LED. It is important to note that the makey makey kit is really just an input device as far as I can tell so far. I have not figured out a way to have the computer actually send information to the board. For example, when I press the space bar on my computer it doesn’t light up my LED. I have to “press” the space bar on the board to light up the LED which also interacts with the Scratch program.
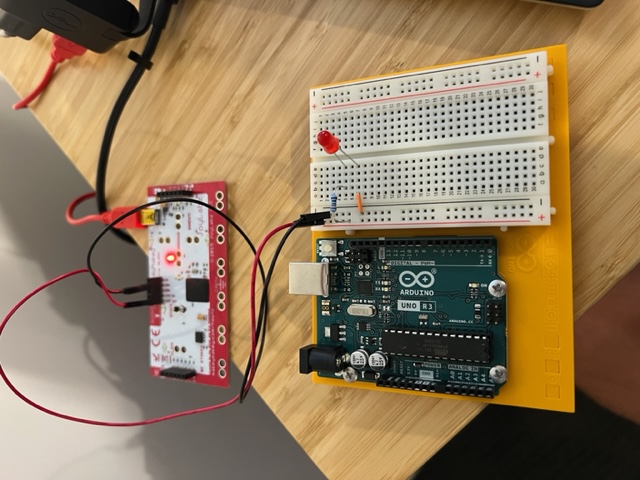
In order to build the circuit you need to connect the key out header on the back of the Makey Makey board to a resistor and then to the long leg (anode) of an LED. Then the short leg of the LED (cathode) is connected to the ground header on the back of the Makey Makey board. Finally, I connected an alligator clip to the space bar button on the front of the Makey Makey Board and touched the other end of the clip to ground to close the circuit on the space bar button. This activates the key out header on the board and illuminates the LED as the wizard twinkles his star. In the photos below you can see the assembled project as well as the project in action. This project is intended to help the learner understand a basic series circuit and how to build one. I used a breadboard to make the circuit hold together a little better but you can do it with only alligator clips. I used the resistors and the LED from the Arduino kit I had but the actual Arduino was not used in this project.